Help center
How can we help you?
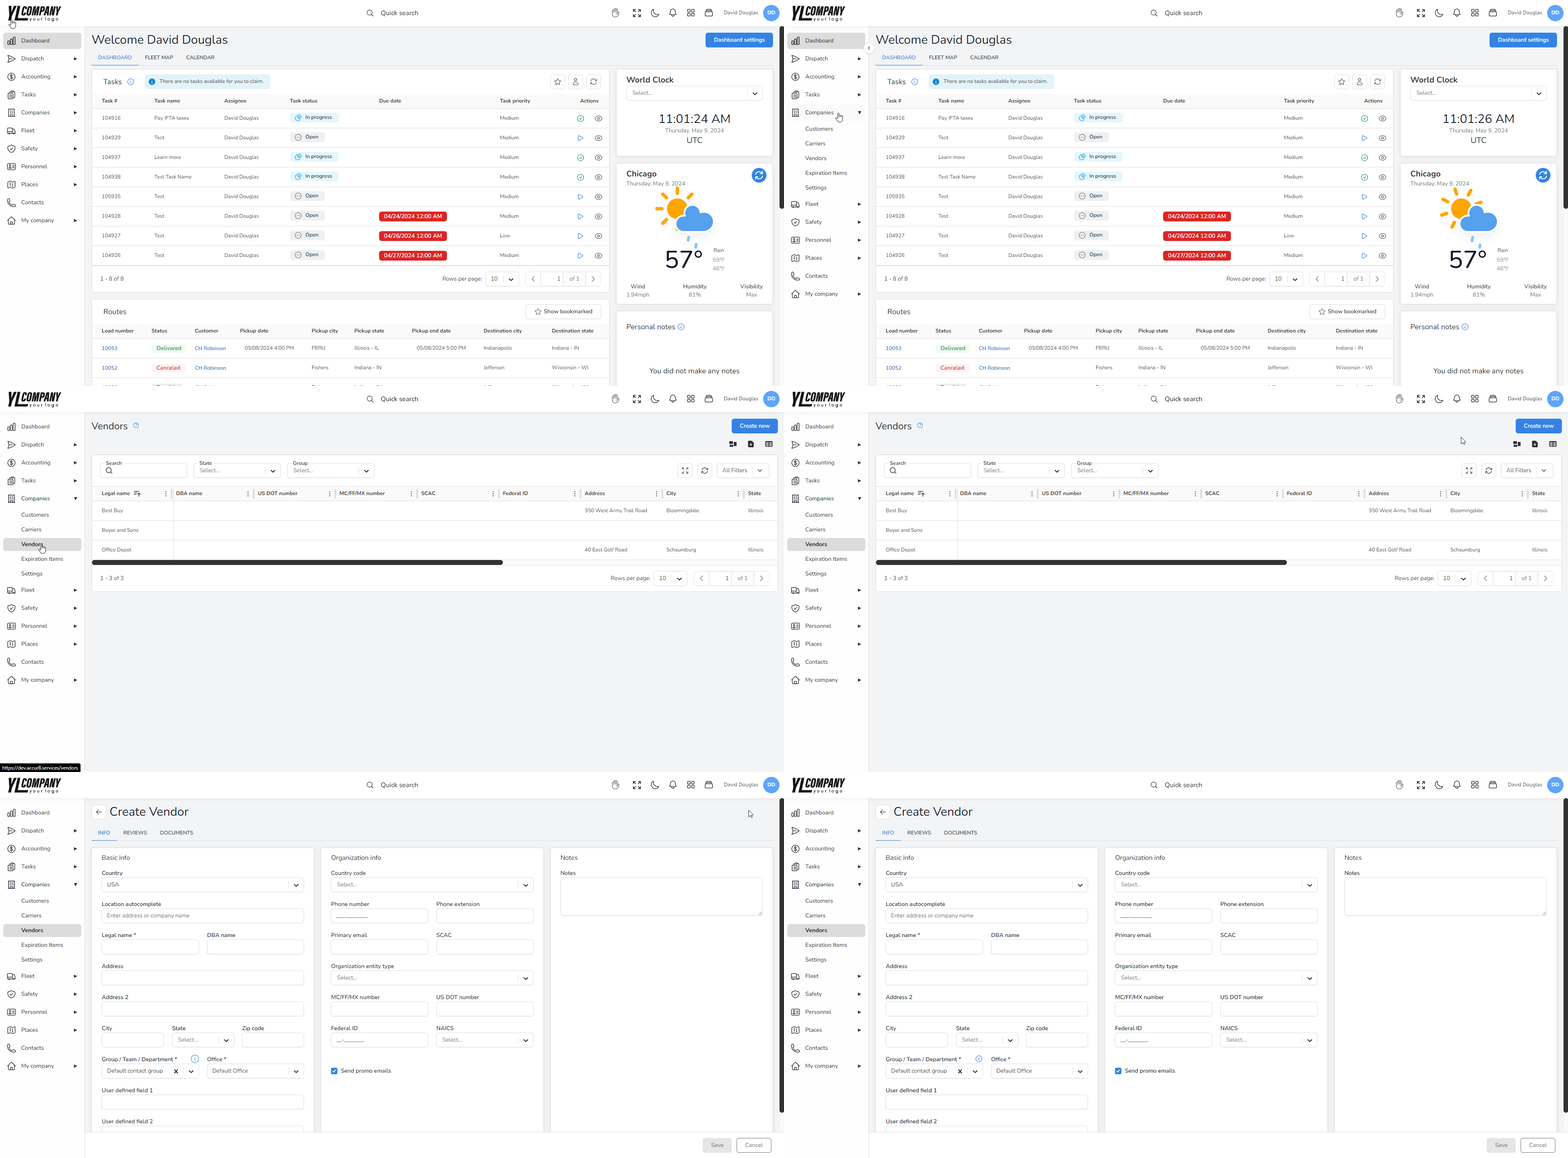
How to Create a New Vendor in Accur8 TMS
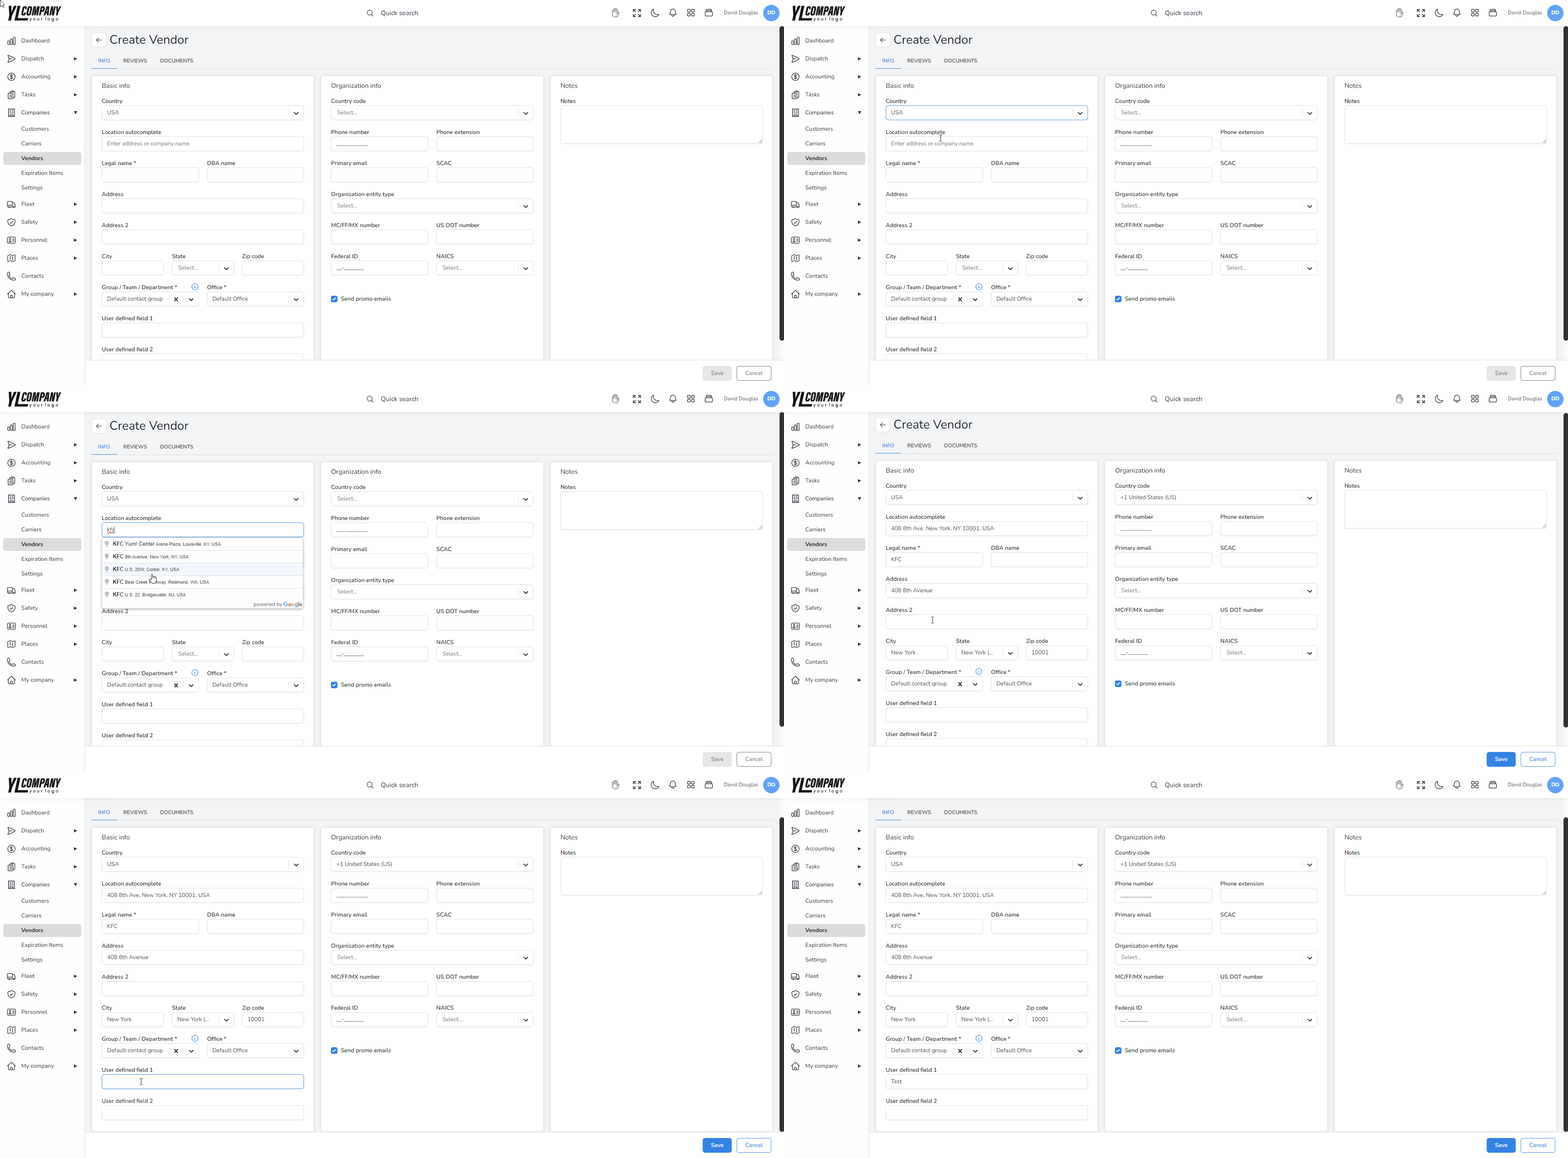
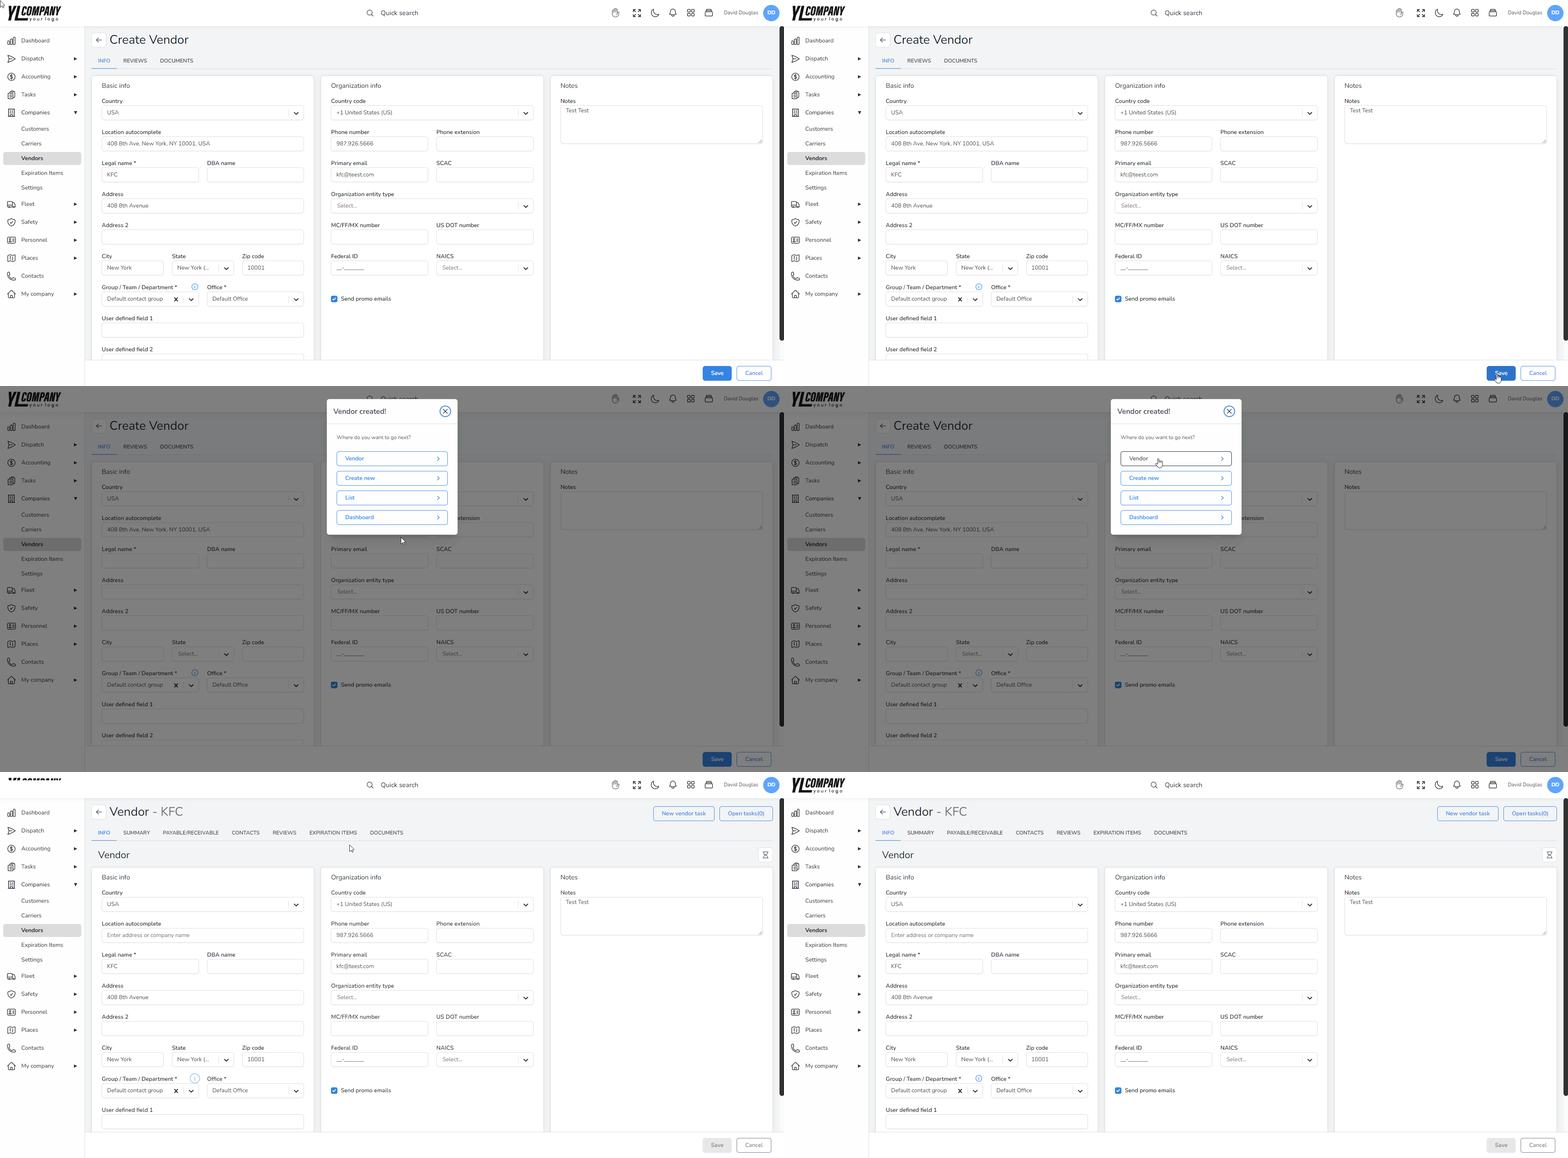
Step 2: Fill Out Basic Info
Country: Select the country where the vendor is located from the dropdown menu.
Location Autocomplete: Enter the address or company name, and the system will suggest the full address.
Legal Name: Input the legal registered name of the vendor.
DBA Name: If applicable, provide the “Doing Business As” name.
Address: Fill in the primary address for the vendor.
Address 2: If there is a secondary address, enter it here.
City, State, Zip Code: Provide the city, select the state from the dropdown, and input the zip code.
Group/Team/Department and Office: Choose the appropriate group or department from the dropdown, and select the office that will manage this vendor.
User Defined Fields: Use these fields to enter any additional information relevant to your vendor management system.
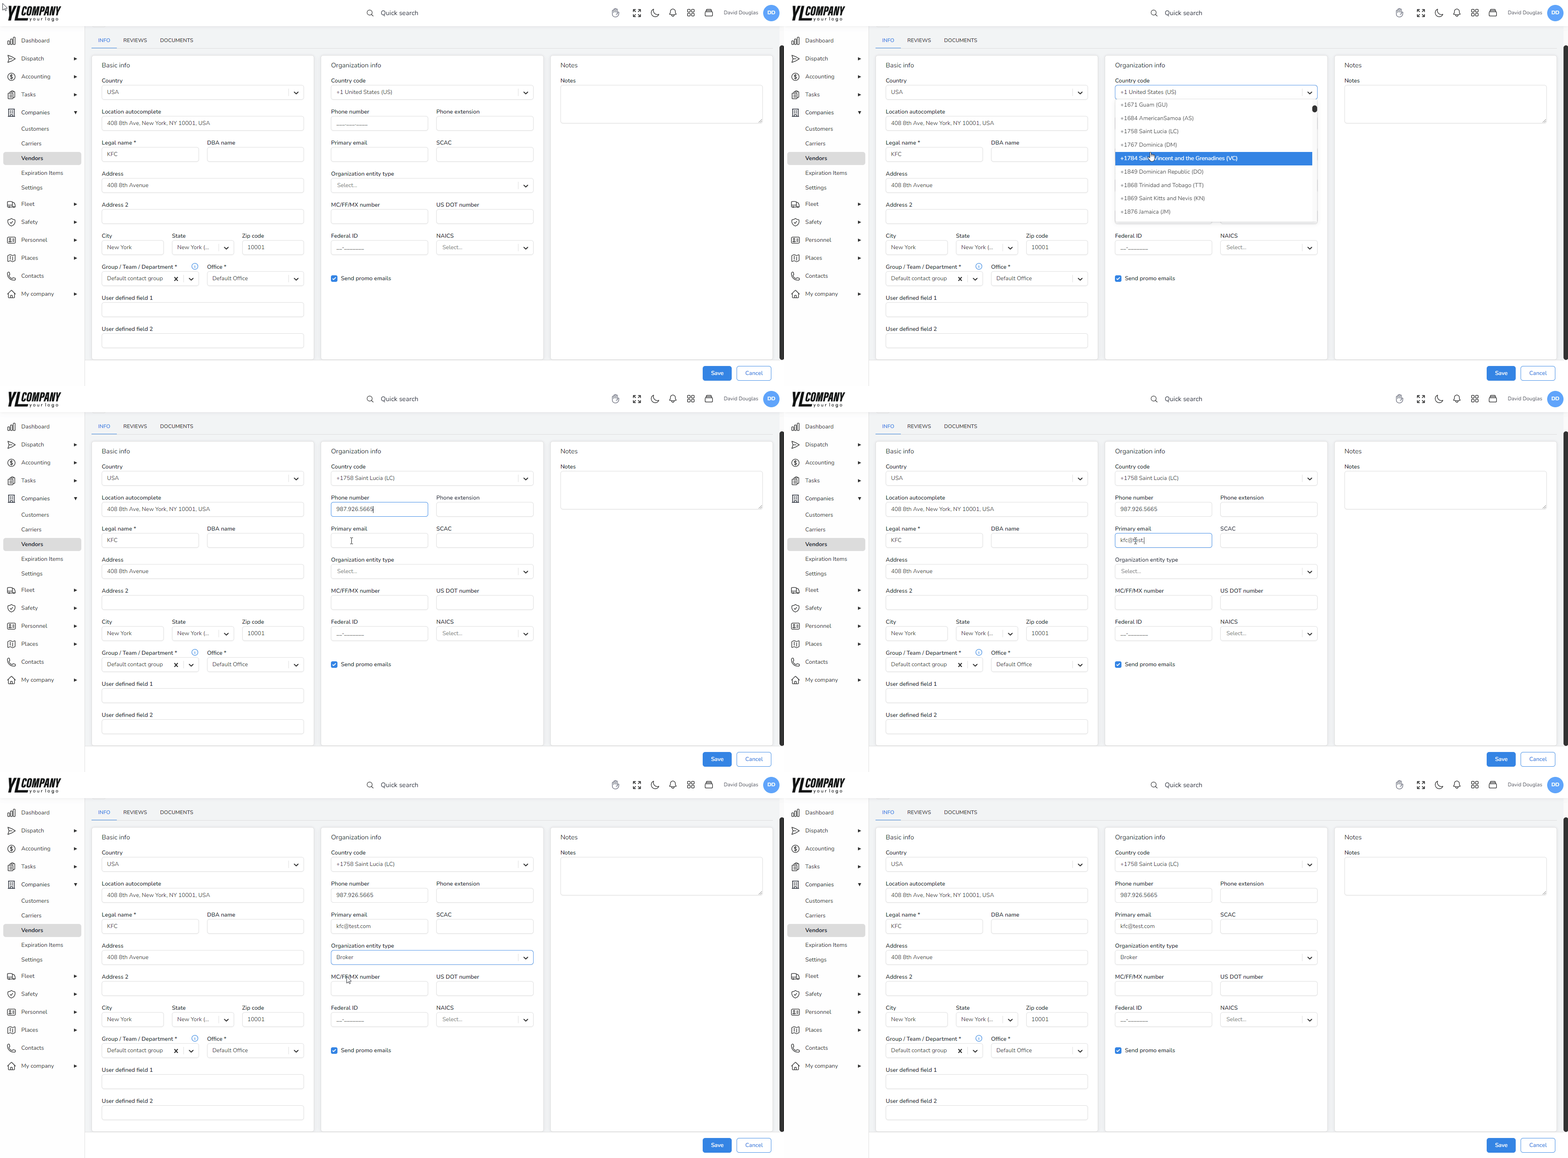
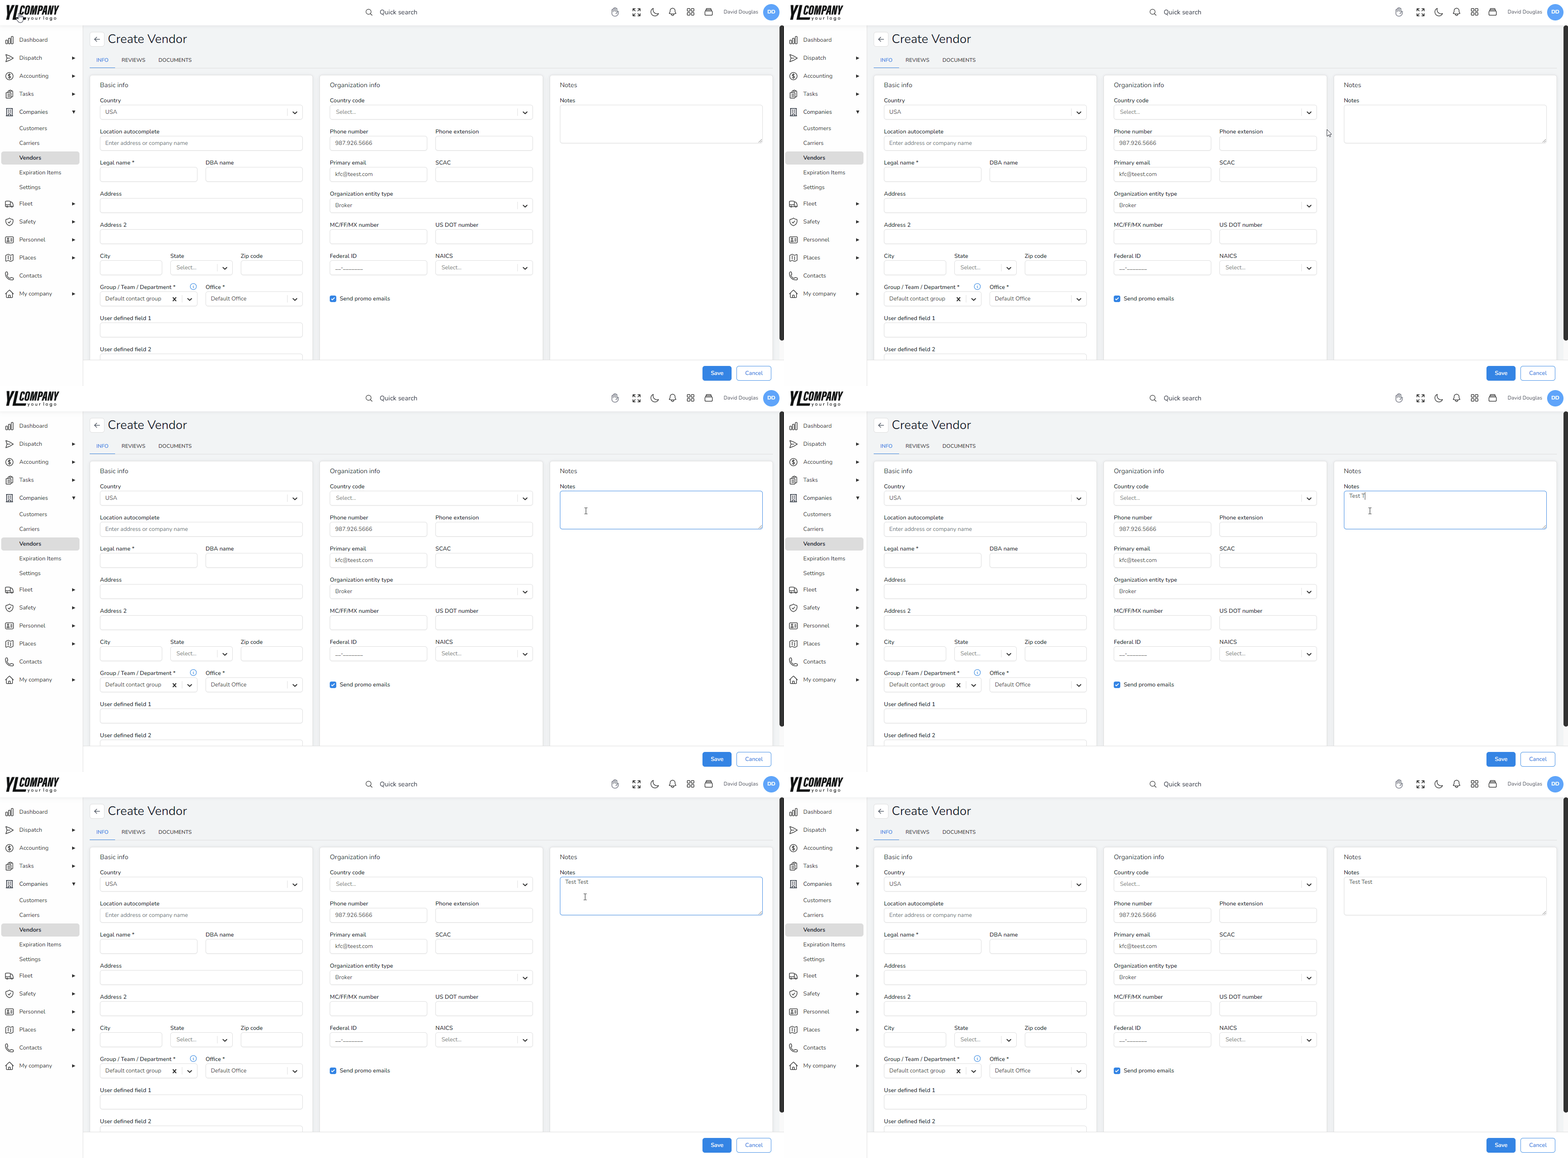
Step 3: Enter Organization Info
Country Code: Select the country code for the phone number.
Phone Number and Extension: Enter the vendor’s main contact number and extension if necessary.
Primary Email: Provide the main email address for the vendor.
SCAC: If applicable, input the Standard Carrier Alpha Code.
Organization Entity Type: Choose the type of entity from the dropdown.
MC/FF/MX Number: Input the Motor Carrier number if available.
US DOT Number: Provide the Department of Transportation number.
Federal ID: Enter the vendor’s federal identification number.
NAICS: Select the North American Industry Classification System code from the dropdown.
Send Promo Emails: Check this box if the vendor agrees to receive promotional emails.
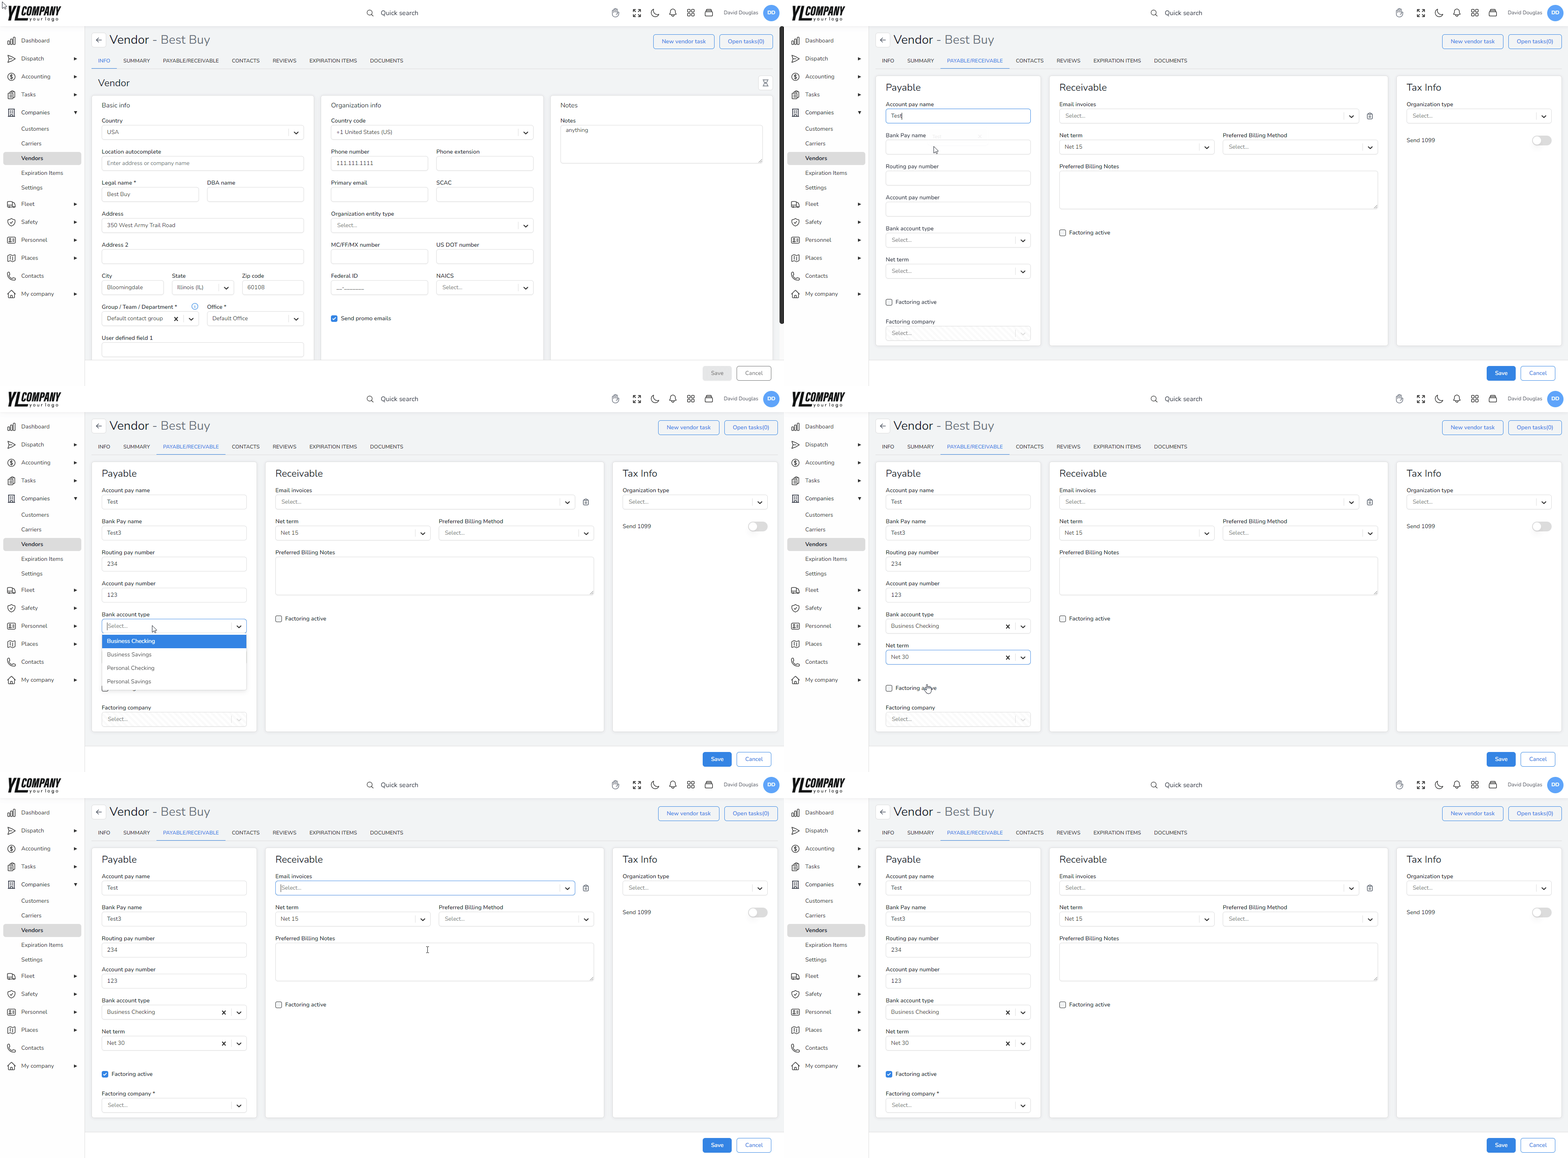
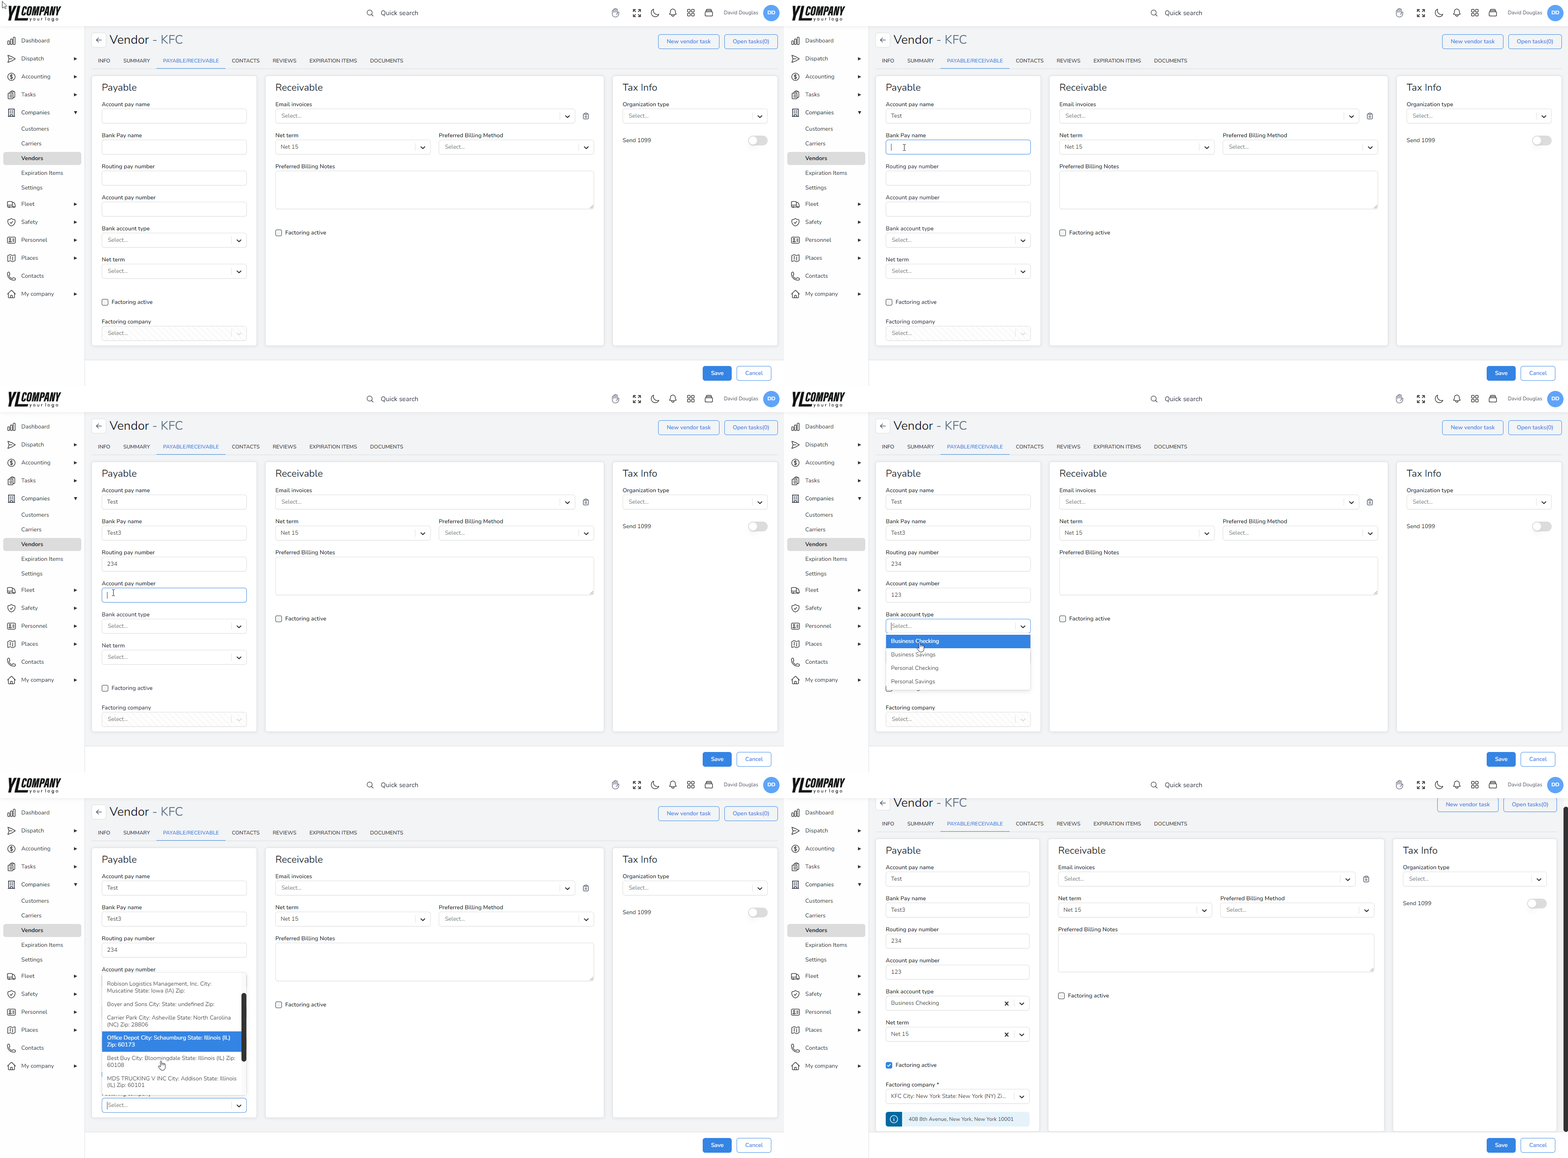
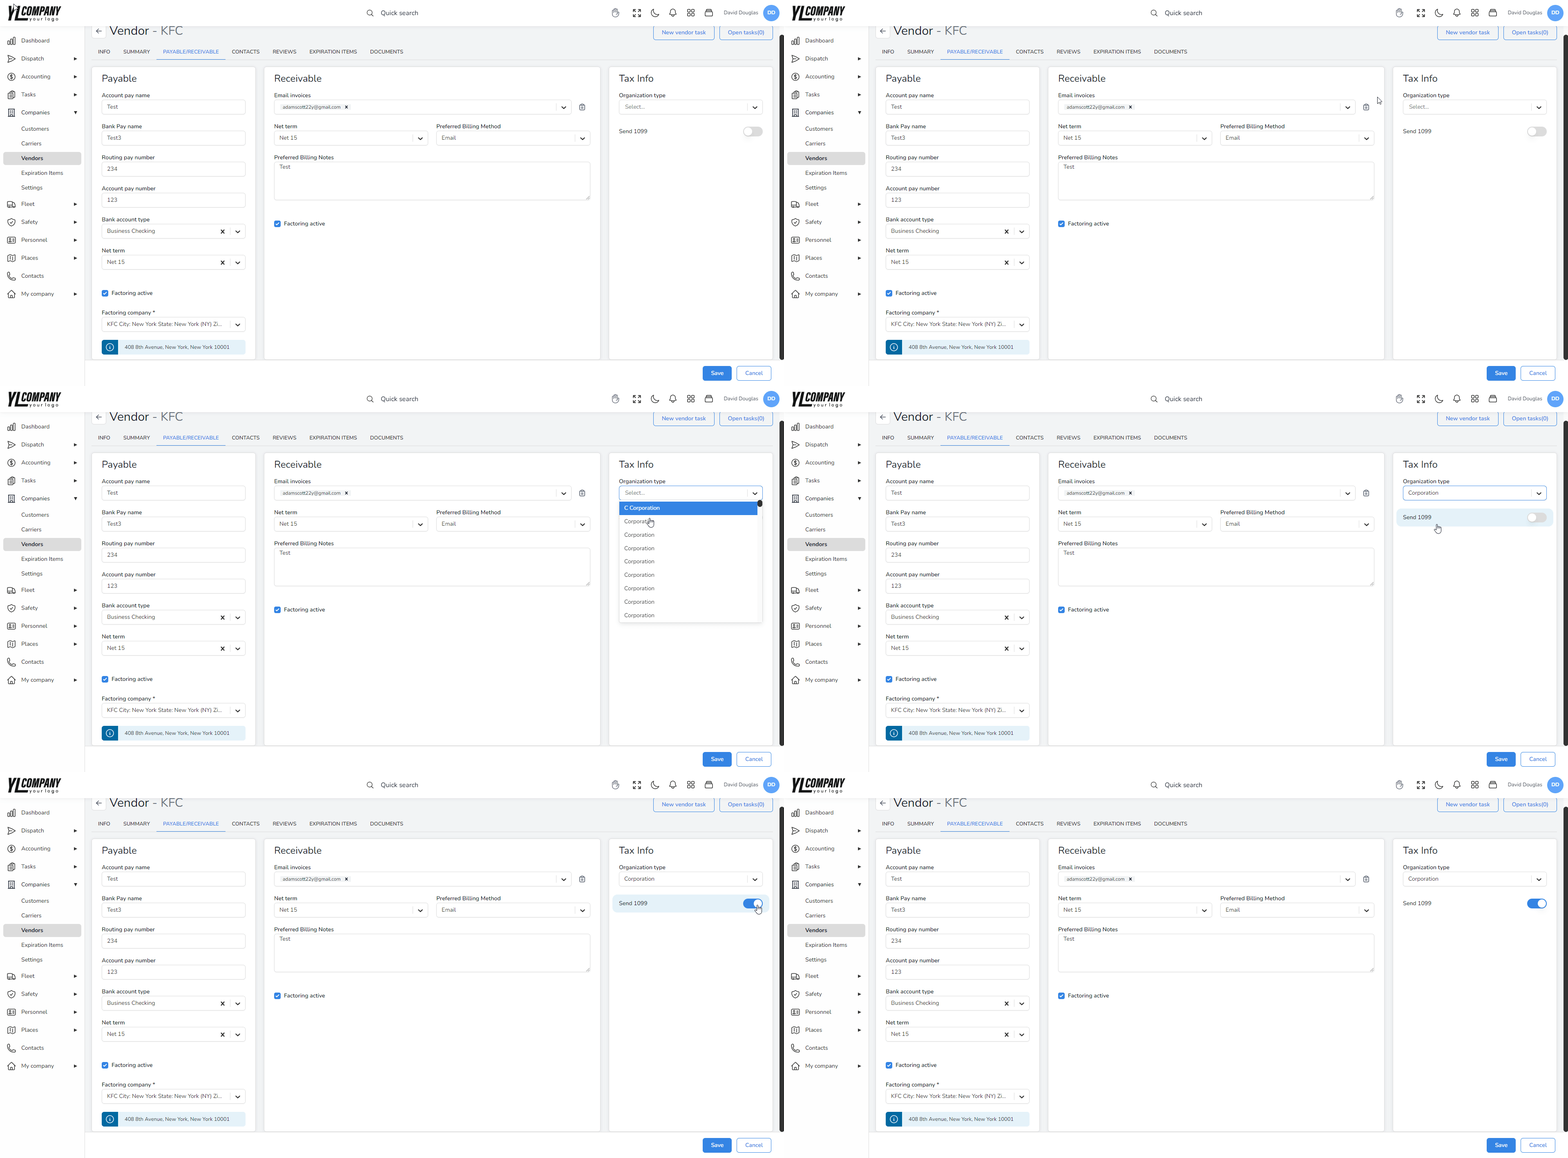
Payable Information
Account Pay Name: Input the name associated with the account used for payments.
Bank Pay Name: Enter the name of the bank where the vendor’s account is held.
Routing and Account Pay Numbers: Provide the routing number and account number for the payment account.
Bank Account Type: Select the type of bank account from the dropdown menu.
Net Term: Choose the net terms of payment from the dropdown menu.
Factoring Active: Check this if factoring is used for payments.
Factoring Company: If factoring is active, select the company from the dropdown menu.
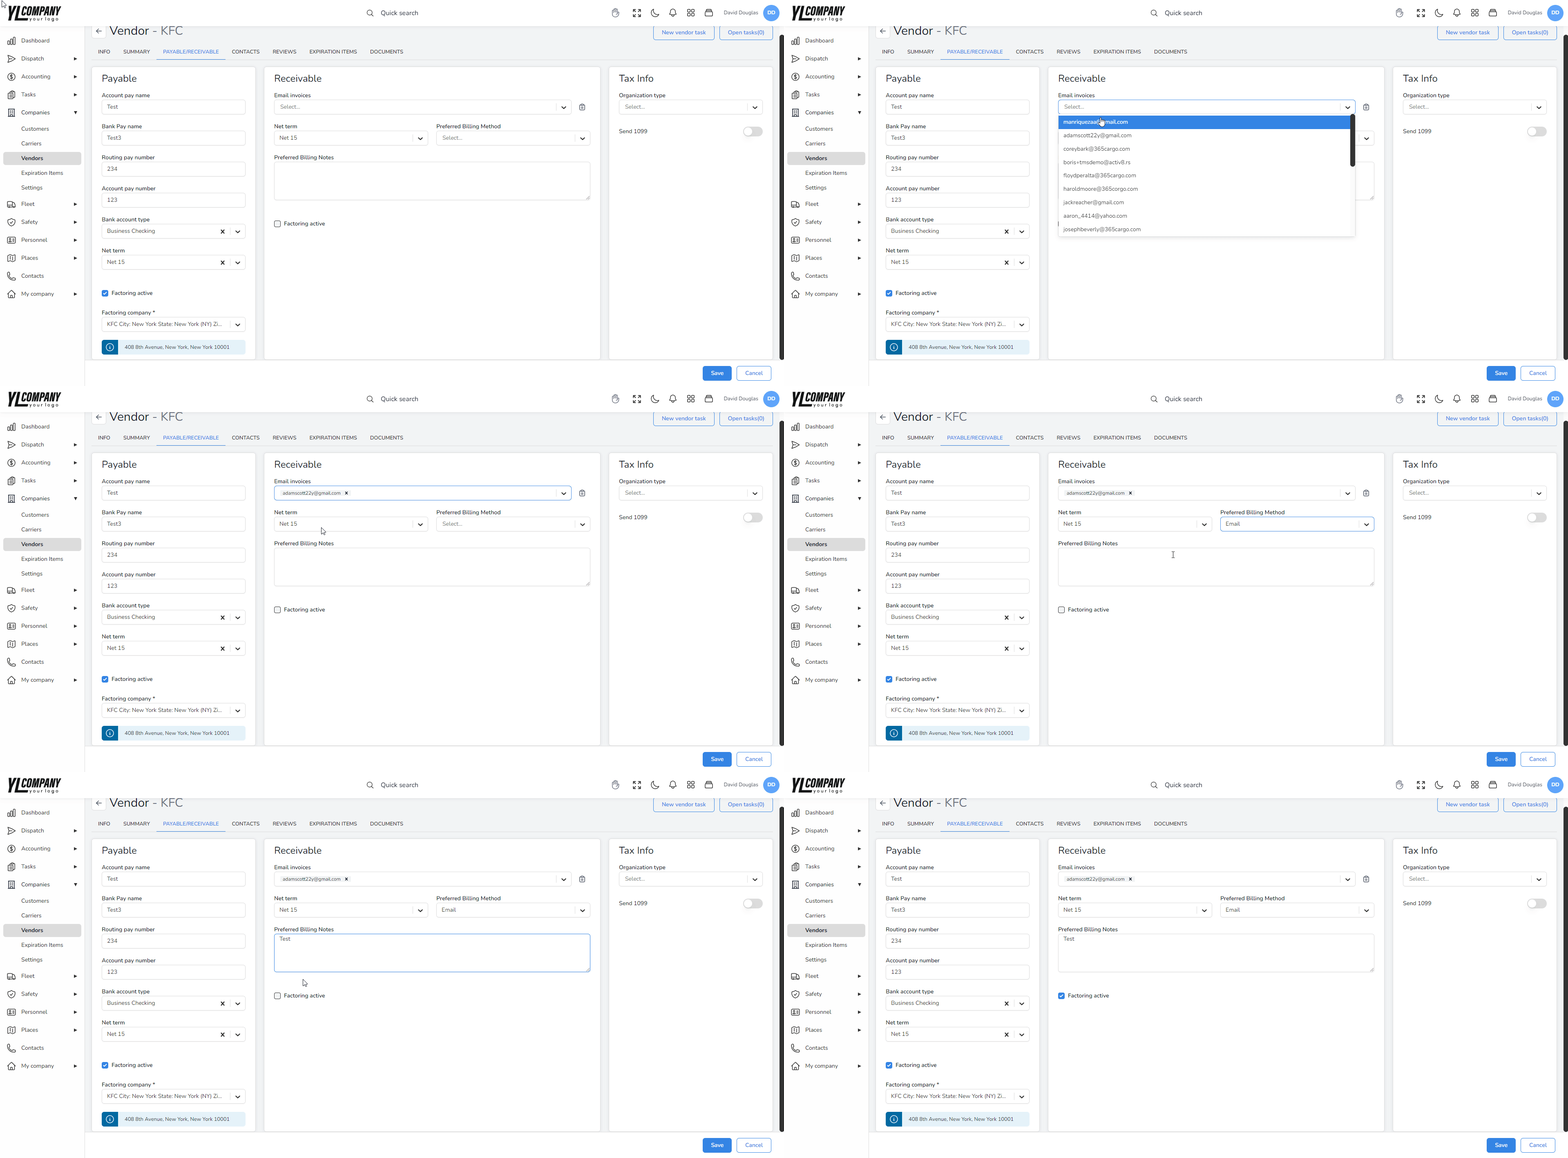
Receivable Information
Email Invoices: Choose if the vendor prefers invoices to be sent via email.
Net Term: Select the net terms from the dropdown menu.
Preferred Billing Method: Choose the preferred billing method.
Preferred Billing Notes: Add any notes regarding billing preferences.
Factoring Active: Check this if the vendor uses factoring for receivables.
Need Help?
If you require further assistance or have any questions regarding the vendor setup process:
- Call Accur8 Support: Reach out to us at (872) 710-1170 for immediate assistance.
- Email Accur8 Support: Send your queries to support@accur8.services, and our team will provide detailed help promptly.
Our support team is dedicated to ensuring you can navigate and utilize the system effectively. Whether it’s a question about filling out forms or a technical issue, we are here to support you.

